AREAS OF USE
City network drinking and utility water
Landscaping sector
Agricultural irrigation systems
Drainage and wastewater transport
Can be used in PN16 pressure values from Ø 20 mm (inclusive) to Ø 110mm (inclusive)
| Temperature °C | -10°C /+25°C | +26°C /+35°C | +36°C /+45°C |
| Working Pressure (BAR) | 16 | 12,5 | 6 |
USAGE INFORMATION
GPA pipe connection adapters should be kept away from hard and sharp objects during storage and installation. If the installation is to be laid underground, it should be covered with sand to protect it from hard and sharp objects.
Teflon tape should be used in threaded connections. The Teflon tape should be wrapped in the tightening direction and enough to prevent water leakage into the adapter. Using too little Teflon tape will cause the adapter to leak water, while using too much will create additional stress on the adapter and may cause it to break during installation. Please pay attention.
GPA COUPLING ADAPTER PRODUCT INSTALLATION STAGES
1- First, chamfer the mouth of the pipe to be used. This allows for easy installation without damaging the O-ring. The cap is put on the pipe with the chamfered end.

2- The ring is placed on the pipe with the low-diameter side facing the cap.
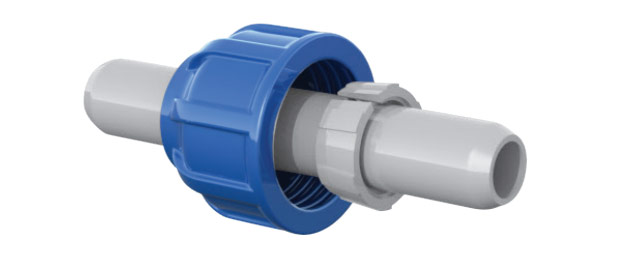
3- The pipe with the ring and cap attached is joined as shown below. Push the pipe to the stop point located inside the adapter. The ovality in the pipe should not be greater than +/- 0.5 mm.
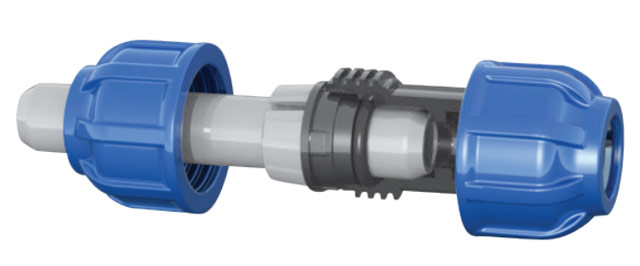
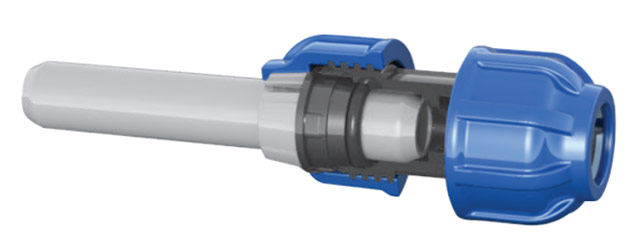
4- Finally, the cap is tightened. Use the GPA coupling wrench to tighten the caps.
GPA SADDLE CLAMP INSTALLATION STAGES
1- The saddle clamp cap shown below is attached to the pipe with its bolts.

2- The sealing gasket is placed in the gasket groove of the saddle clamp outlet side and attached to the pipe.
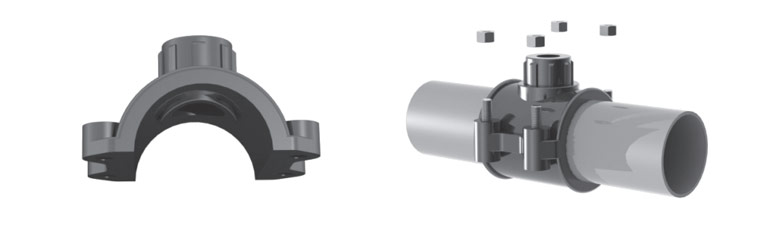
3- The M8 nuts are tightened with a 13 mm wrench to complete the installation. Finally, the pipe is drilled with appropriate tools, and a suitable adapter is attached to the outlet side.
